Introduction
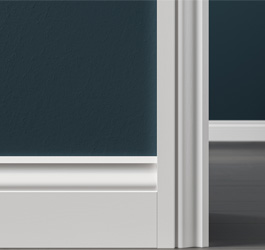
MDF (Medium Density Fibreboard) skirting boards are a popular choice for adding a finishing touch to your room's decor. Not only do they provide a clean and polished look, but they also hide unsightly gaps between the wall and floor. If you're looking to enhance your room with our stylish MDF skirting boards, this step-by-step guide will walk you through the process.
Tools and Materials Needed
- • MDF skirting boards
- • Measuring tape
- • Pencil
- • Mitre saw or coping saw
- • Adhesive
- • Nails or screws
- • Hammer or screwdriver
- • Spirit level
- • Filler
- • Sandpaper
Step 1: Measure and Cut
Start by measuring the length of each wall where you plan to install the skirting boards. Remember to measure each wall individually, as they may vary in length. Once you have your measurements, transfer them onto the MDF skirting boards and mark where you need to cut.
Use a mitre saw or coping saw to make precise 45-degree angle cuts at the corners where the skirting boards meet.
Step 2: Prepare the Walls and Skirting Boards
Ensure the walls and skirting boards are clean and free from any debris. If the walls are uneven, use filler to smooth out any imperfections. Sand the skirting board edges lightly to remove any rough edges.
Step 3: Apply Adhesive
Apply adhesive to the back of the skirting boards in a zigzag pattern. Alternatively, you can apply adhesive directly to the wall. Be sure to use an adhesive that is suitable for MDF and provides a strong bond. Speak to our team or email us at [email protected] to obtain a quote for our Pink Grip adhesive.
Step 4: Position and Secure
Carefully position the skirting boards along the walls, ensuring they are level using a spirit level. Press firmly to ensure a good bond with the wall. If necessary, use nails or screws to secure the skirting boards in place, making sure to countersink them slightly.
Step 5: Fill and Sand
Once the skirting boards are in place, fill any gaps or nail/screw holes with filler. Allow the filler to dry completely, then sand the skirting boards smooth for a seamless finish.
Step 6: Finish with Paint
Finally, paint the skirting boards to match your room's decor. Be sure to use paint that is suitable for MDF and apply multiple coats for a durable finish.
Final Thoughts
Fitting MDF skirting boards is a straightforward DIY project that can instantly elevate the look of your room. By following these step-by-step instructions, you can achieve a professional-looking result with ease. So, roll up your sleeves, gather your tools, and give your room a polished finish with our MDF skirting boards.


